Sunday, July 31, 2011

Sensory Bead Chain Toy

Yesterday, my husband was nice enough to help me make something for a little guy in my classroom.  I am determined to have this little guy reaching out and exploring items more often and more purposefully! 

This is based on the Somatosensory Bead Chains, designed for children and adults with limited ability to explore their environment.  These bead chains sell for about $75.00.  The beads provide a ton of movement with very little physical exertion.  This can be a great beginning cause and effect item.


We've borrowed the bead chains from our AT department several times before.  But, there's only so many times I can borrow toys and actually remember to return them on time!  I think I've hit my limit...so now I'm starting to think of ways to make some of them myself! 

T connectors (2)
When I saw the plans for a bead chain made from PVC pipe on THIS  PDF, I at least I knew it was possible (although we made ours a bit differently)!  So we headed to the home improvement store and bought:
  • 2 (5 foot) lengths of 1/2 inch PVC piping (We cut this into five 17 inch pieces)
  • 2 right corner connectors
  • 2 T connectors
  • 4 end caps
  • 3 packages of bead necklaces from the Dollar Store
  • Bouncy toys and shower curtain rings I had already
I just estimated at measurements and randomly told my husband to cut all the pieces 17 inches.  Surprisingly, this seemed to work pretty well!  However, we did not use any PVC glue to connect these pieces together yet, just in case I eventually want this shorter!

Corner connectors (2)
We made the frame with three of the 17 inch pieces, connected them together with the two corner connectors and added the T connectors to the bottom of each pipe.  We then added the 2 legs at the bottom and capped off the exposed pipe with four caps!  

End caps (4)
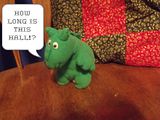
I then attached a strip of Velcro to the top, added the opposite side of Velcro and stuck all the beads (each bead string is cut) to the sticky side so they draped over this.  I added several toys that bounce (attached several shower curtain rings to make them easier to grab) and.... ta-da!   That's it!  (Of course, if you want to make it look a bit better- some paint wouldn't hurt!)
The whole length of bead chains can be removed and changed to something
else simply by pulling off the Velcro.
Of course, this was made for a little guy who has limited mobility and physical strength.  He also will always have someone right next to him while he is playing with this!   The Velcro would NOT be strong enough for use with a child with typical physical strength!  These items could also pose a choking hazard!  This will always be used with direct supervision by an adult!

The "tail" of this little dog bounces up and down with just a
touch! 

Saturday, July 30, 2011

Task Box #1: Monkey Grab and Drop

I am SO excited about this latest do it yourself...save lots of money idea for the classroom!  I just had to share how I made these! 
So, I've wanted to make some more permanent task (or work) boxes for IEP goal work for a while now.  I've previously used baskets and tubs (and have kept ALL of the IEP goal work for a specific child in one basket or tub).  They just haven't seemed very permanent or organized, they can't be used independently at all and they don't give the child a clear visual idea of when the task is complete. 


My search began!  I found these beautiful task boxes for sale!  Yikes!  Each task box is between $35 and $45 (and they're not even clear boxes).   I would much rather make my own, very individualized boxes (based on the child's individual IEP goal)...and I'm pretty sure I could make each box for under $5.00!

So, my search continued!  I found lots of ideas for making your own task boxes...but I kept coming back to these slick boxes that clearly cost too much! 

I realized that I wanted clear boxes (not cardboard boxes)!  I also loved the idea of a container attached to the box to either hold a certain number of items for the child to then pull out and complete the task or to put the items in as they work on the task  

*(When the cup is empty, the task is complete or when all the items are IN the cup the task is complete- very visual). 


Finally, I hit on an idea I thought might work!  I bought some plastic shoe boxes for $1.00/box.  I bought plastic cups (6 for .80 cents).  I used an Exacto knife to cut the hole for the cup and inserted the cup.  It fit perfectly!  The cup sits on the bottom of the box with just a small amount of the rim showing above the hole in the lid. 

The idea is that the child will always work from left to right on the task, whether the task requires them to put items IN the cup or take them OUT.  Therefore the placement of the cup on the box top may change depending on the task; but the child will learn that they work from left to right, no matter what.

This particular task box was created for a little guy who is working on reaching out for an item and grabbing it.  Ultimately, the goal is to grab the stuffed animal and drop it into the cup.

We will probably use backward chaining for this task and start by handing him the monkey to hold and drop into the cup.  We'll work backwards until he is reaching out, grabbing the ring, picking up the monkey and then dropping it into the cup.  (This is one of the most basic task boxes I will make and would NOT be appropriate for all children.  I will be creating more advanced task boxes as well!)


In order to make the stuffed animal more manageable to grab, I simply took a shower curtain ring and squeezed enough of the stuffed animal into the opening to make it hold!  This way he can reach out and grab the ring to pull the monkey to the cup.  He can focus on just this one item and one task.  (And it's easy enough to simply attach the ring to another stuffed animal based on interest or topics we are focusing on in the classroom!)


The best thing about these task boxes is that when we're finished, we simply pop the top off, put the items back into the box and stack the boxes on top of each other! 

We can easily see what items are in each task box.  However, to make it even more user friendly, my next step is to take a photo of the monkey and attach it to the box so the child can clearly see what is inside and what task he will be doing.

Total cost for this task box:  less than $1.50 (I had the shower curtain ring and stuffed animals already)

If you are interested in creating task boxes, stay tuned!  I do plan on making more adveanced  task boxes that I will share here!  Oh, I have a ton of ideas for these!   Off to the store to collect more plastic shoe boxes!

Friday, July 29, 2011

Yikes!

My vacation time is very quickly winding down... or more like crashing to a close!  I am lucky enough to head back to the classroom on Monday to not just ONE new teacher associate to meet...but TWO! 

Wow!  Yikes!  I'm a bit nervous! I feel a bit like a stranger walking into my own classroom!   I almost always feel like I've just run into a brick wall the first few days I am back from vacation, but this is ridiculous!  I have only briefly met one of my new teacher associates.  The other one I haven't even met yet!

So think of me Monday morning!  And don't be surprised if these daily blog posts turn into every other day blog posts after Monday...or twice a week blog posts very quickly for a while!  I have a feeling I may be collapsing on the couch from exhaustion when I get home from school!

Thursday, July 28, 2011

The Colors of Nature

I made nature color packets today!  I gained inspiration for this idea this from Deborah's Forest Treasure Box at Teach Preschool. I really liked this idea; but just wanted to use the items we find while we're outside, rather than making up a box. I also didn't want to have to go around our outdoor area picking up small paint chip cards all over the place! :)


Here was my solution:  I started by finding paint chip cards in many different shades of browns, yellows, oranges, greens and whites, sorted them into color packets (I did combine the yellows and oranges since there were fewer) and sequenced them from darkest to lightest. I then punched holes in each at the bottom and used a brad (paper fastener) to attach each group of cards so we can fan them out and see all the shades and seperate colors! 
 

I think I will just pop these in our outdoor backpack to take outside with us! This way I can just use them informally with the children while we are outside and while they are interested. I think these will be a good way to introduce the children to looking more closely at natural items they find while outside! We can use these to find the color of a rock, the color of the grass they are sitting on or the color of the tree trunk. 


This will also be a good way to begin to introduce the idea of shades of color. Most natural items may fall somewhere in between the colors on the paint chips. Mentioning that an item is a bit darker or lighter is a way to introduce the children to the concept that natural items are generally not simply..."yellow" or "brown"...they may be dark brown or light brown or somewhere in between!


I'm also excited to introduce the children to the wonderful names of some of the colors on the cards! I think it's much more exciting to call the color of a tree trunk "Toasted Sesame"...or "Afternoon Tea" rather than...brown!


**On a side note:  I have no idea why I thought of using paint chip cards for this idea...and when I was making my color matching file folder game....I DIDN'T think of using them! Check out Debbie's comment on my color matching file folder game. She's absolutely right!  Use paint chips rather than your color printer ink!

Wednesday, July 27, 2011

The Funny Thing is...

You know, the funny thing about writing or reading a blog is that it really isn't the same as writing or reading a book or magazine article.  It's more like having a conversation with people you know, but haven't met in person yet.  You're just not quite sure who will stop in to have that conversation, until you start it!  And, of course, a conversation on the Internet can involve multiple people, with multiple viewpoints all at once! 

I think for teachers especially, this can be such a wonderful tool! 

Why?  Well, teachers often share quite a bit with their colleagues within their schools.  Unfortunately, these are the people who are probably dealing with some of the same struggles, working within the same framework and expectations and bogged down with the same challenges within the classroom!  After years of working together, these people tend to  recycle the same ideas over and over to each other, which makes innovation and change much more difficult!

In comparison, the Internet is continually changing.  People are moving in and out of various groups and discussions.  Unless you isolate yourself and only move within a small circle of ideas and discussions, it would be nearly impossible not to find at least some new viewpoints and ideas for the classroom!

And, because these people aren't always working within the same restrictions, the ideas may be something you never even considered!  So, whether you are involved in many discussions and share many ideas, or follow only a few discussions, I think conversations on the Internet about teaching and education in general can have a very positive effect for many teachers.

And, while you may not be able to implement all of the ideas you want...you will certainly never be short of ideas!

Tuesday, July 26, 2011

The Days of the Week Zoo!

Years ago I began using small stuffed animals and the animal names when talking about the days of the week at calendar time.  I began doing this in order to help the children remember the name for each day of the week.  I also used this as a way to introduce the children to listening for similar sounds in words.


I tried to think of animal names to go with each day of the week.  Except for Thursday, I was able to do this.  Here is my current days of the week list:
  1. Mouse Monday,
  2. Tigger Tuesday,
  3. Worm Wednesday,
  4. Thumbkin Thursday,
  5. Fish Friday,
  6. Spider Saturday
  7. Snake Sunday
Basically, we just pull out the correct stuffed animal for the day of the week (except for Thursday, in which case we give a "thumbs up" :)  The addition of a visual prompt helps the children remember the name for the day of the week!  (Just be careful that the visual prompt doesn't become so distracting that the children don't focus at all on the name for the day of the week!)

Here are a few of the things I noticed when I was implementing this: 
  1. During center time, the children often would pull out a stuffed animal and begin talking to each other about what had happened on a certain day of the week while holding the stuffed animal associated with that particular day of the week. (not always accurate information, but often stories)
  2. Children began noticing other words that started with the same sounds! 
  3. Children were able to remember the names for the days of the week quite quickly after seeing or holding the animal associated with it.
  4. As teachers, this gave us a way to begin conversations about events that happened in the past or will happen in the future.  It also gave us a way to initiate conversations about events that happened during the weekend.  For children who have enough language and are beginning to want to talk about their weekend, this can be very powerful!
When I began thinking about using this strategy with my classroom now (all of the children have very limited language) I made sure to add some sensory elements in to the mix!  This gives all the children a way to participate (ex. by holding the mouse while it wiggles) and gives the children another sensory clue to remember the day of the week.

"Mouse Monday"- When we pull the tail on this little mouse it vibrates and
 wiggles around!  This gives it an added sensory aspect.

"Tigger Tuesday"...I know, I know, not a REAL animal; but technically, he is a tiger!
I have several other Tiggers, but decided I wanted this one because it has the soft feathers
for another sensory experience.

"Worm Wednesday"

"Fish Friday"

"Spider Saturday"- This spider has a string you can hold and make him
bounce up and down!

"Snake Sunday"- This snake is long enough that the children can wrap
him around their body or hold him on their lap!

Monday, July 25, 2011

Sign Language Reminders at Our Fingertips!

I've continued over my break to go through my tubs and drawers of random school items and pull out  things that I haven't used in a while...but need to!  Today on my quest for hidden treasures in my home office, I came across these sign language reminders!   A student teacher of mine quite a few years ago made them for me (how nice was that!?)  She organized them into four simple categories:
  1. Family/Friends
  2. Snack
  3. Animals
  4. Colors

These are simply basic signs that are great to use with children who are just developing language, who have speech/language and/or communication delays or who need a visual prompt in addition to a verbal prompt to attend to a specific task.  Although none of the children in my classroom currently are deaf or hard of hearing; all of the children in my classroom have speech/language and communication delays.  We regularly use simple signs in the classroom along with verbal speech to emphasize certain words.

While I know most of these signs already, a little reminder never hurts!  I also have some new teacher associates in my classroom now; so these will come in VERY handy for these new people who might not yet know some of these basic signs!

I also found a small collection of these little wrist key holders.  These worked perfectly to hold and divide the collections of sign language cards.   We'll just need to slip them on our wrist (for instance at lunch or snack) and we'll have our hands free, but will still have these reminders easily accessible! 

If you would like to make your own sign language reminder cards, here are a few websites to start with!  These are just two suggestions of sites I found that offer printable sign language cards; I know there are many others sign language sites out there!  There are also many wonderful sign language books available that would help with creating these reminder cards!
  1. Baby Sign Language Cards  (While "baby sign" is not generally used as a true language form- as ASL is- these are very simple signs that are regularly used with hearing children to accompany beginning verbal language.)  If you click on a word, you will be able to view a video clip of the sign as well as print out a sign language reminder card!
  2. Alphabet Sign Language Cards This site offers the alphabet in sign language reminder cards.
  3. Signing Exact English   This is one of the sign language books that I have.  It's a great dictionary of signs.  It utilizes "Exact English" which varies from ASL.
  4. My First Sign Language BookThis is a first sign language book for children with some very simple signs.

Sunday, July 24, 2011

Remote Control Bumblebee Painting!

I spent today painting my kitchen.  I figured since I have painting on the brain today; I'd tell you about a painting activity I plan on doing with the kids when I get back to school. 


I have this cute little bumblebee.  It's actually a remote control bumble bee.  I put some paint in a large cardboard box top and let the bumble bee move around the box!  (The kids in my room will love this :)


This is one of those ways to make painting easier for children who may not be able to hold a typical paint brush!  Pushing the button on the remote control activates the bumblebee.   This also offers children a way to interact and attend to the same activity without needing to follow very specific directions; since this is very open-ended.


I'm sure you could use any type of remote control.  This bumblebee, however, has very large tires which did seem to help with the painting!  I would try the painting out first with a small amount of paint and make sure it didn't somehow ruin the remote control mechanism.  It didn't seem to harm this one!  I also plan on adding the ladybug from our ladybug painting to the box at the same time at some point!  I can't wait for the craziness this produces!

The children in my room will definitely like this remote control bumblebee painting!  We'll just have to have a bug painting party!

Saturday, July 23, 2011

Saying Goodbye

Yep, I'm not good at saying "goodbye"!  The last of my little classroom team of teachers that we had going for a number of years has just started teaching in her own classroom.  So...I'm starting over.  Boo-hoo.  Yes, of course I'm excited for her, just bummed for me.

I'm not sure many people, other than early childhood educators, REALLY understand how important wonderful teacher associates (or assistants) are to the everyday functioning of the classroom!  I think sometimes people think assistants simply sit in the back of the room and laminate things! (I'm silently chuckling to myself about that last statement! :)

Of course, we all know how important every single person is to the classroom environment.  It just takes a while for a new team to really begin working together smoothly!  When you have a team that functions like a well oiled machine it's not easy to start all over and build that up again from scratch! 

Believe me...I know!  I've had associates in the past who have clearly and openly said they have no desire to work with children with special needs.  ...Um....tell me again why you took the job!?  I've had associates who clearly envisioned sitting back and relaxing all day while getting paid!  Not in my classroom...are you crazy?!

But those people are definitely NOT in the majority!  Thank goodness!  So, we'll work on getting our new team moving smoothly through the day!  I'm sure the children will grow to love these new wonderful people!  It will be a new adventure; as each person brings something new to the table!  It still doesn't make saying "goodbye" any easier!

Friday, July 22, 2011

One More Week...

I have one more week of my break left...one more week of waking up to my dogs barking at 5:40...letting them out, surfing the Internet for an hour or so....and then going back to sleep on the sofa :) 

One more week.  One more week to dress in t-shirts and Capri sweats...ALL day.

One more week.  One more week to stay in my pj's all morning if I choose...and, yes, I did choose to do this one day! :) 

One more week.  One more week to stand in front of the fridge and snack for lunch time...rather than actually making a lunch.

One more week.  One more week to paint my kitchen...to have my kitchen torn apart so I CAN paint my kitchen...without going crazy because everything is torn apart! 

One more week.  One more week to decide to meet a friend for lunch at 10:45...and meet for lunch at 11:45.

One more week.  One more week to do my grocery shopping in the middle of the day...in the middle of the week...when the store is completely empty...except for me!

One more week.  One more week to spend my day doing whatever comes to me at the moment!...at this moment I'm thinking about heading back to bed (it's 7:35 in the morning people...too early for me to be up!) :)

OH, just ONE MORE WEEK.....where DID this month go?!

Thursday, July 21, 2011

Color Matching File Folder Game

Sometimes I do think I over think things a bit, especially when I create new items for the classroom!  Oh, but not this time! :) 
I made this several years ago for a little girl who was just beginning to match colors, but who was SO highly distracted by everything around her, that she simply could not focus on matching colors if it involved anything else! 

I have a few children now who could benefit from this very simple, basic matching as well, so I have it packed up and ready to go back to the classroom!

I basically just used Word to make color rectangles.  Then I cut out, laminated and put Velcro on the back of one set.  I kept the second set together on the page, laminated the entire thing, put the other side of Velcro on each color and attached it to a file folder (you could laminate the entire folder before you add the Velcro).

Of course, I added an envelope to the opposite side of the file folder to hold the individual color rectangles.  When I use this with a child, I always start by taking a plain piece of paper and covering all but a few of the colors for the child!  I always want this to be a successful, enjoyable activity for the child...a challenge...but not so difficult that the child doesn't want to participate.

This is an extremely simple idea, but effective.  For some children it is nearly impossible to "tune out" the visual stimuli around them and focus on any one activity.  Taking out ANYTHING visual that is not necessary to the activity allows the child to actually focus on the activity and complete it.  And this can bring such a sense of accomplishment that they want to try again..and again!

Wednesday, July 20, 2011

Adapted Play Plans

I've had to postpone painting my kitchen for a few days since it is SO hot here!  So I've had a bit of time to go through some things I intend to take in to school to begin using with some of the children.  I found these adapted play plans and decided I needed to pull them out to use in the classroom again!   
This is the outside of the play plan.
Play Plans are NOT an idea I developed, but rather adapted from what is being used in many of the larger group classrooms in our program (I believe it originally comes from the Early Reading First initiative).  Basically, the children are encouraged to use invented spelling, pre-writing or whatever writing stage they are at, to write out a plan of something they would like to do during center time (they always start with a sentence stem).  They are also shown how to trace or sketch the item or items they may use during this time (example:  tracing around a block if they want to play with the blocks). 


In my classroom, we are simply not at the point where we can sit still long enough to complete this or have enough meaning behind it- not to mention the fine motor skills that are involved with this activity!  So, I basically adapted this to use with some of my children who are ready and able to understand this. 


The child can work with an adult who labels the items that are choices (we generally start with only two choices to choose from and work up from there). After the child makes a choice by pointing to the picture, through eye gaze, pulling the picture off or pulling the picture off and handing it to the adult, the adult then helps the child place the item on the Velcro and helps him/her "read" the sentence.  


The adult then helps the child find the item they have chosen and play with it for a few minutes. If the child is interested, the play can continue, but if the child is clearly not interested any more then the toy is put away.  After this the child is allowed to move about the classroom and chose various toys as he/she wishes.  

In this case, the idea behind this isn't that the child has to stay in one area for any length of time.  It basically is that:
  1. the child learns that the picture represents the object.
  2. the child learns to make a true choice with pictures.
  3. the child begins to recognize that the words on the folder have meaning.
Even if the adult is doing all of this except for choosing a picture, the child will benefit from the repetition of the activity.  For children with language and communication delays,  I have found that it often takes many times for a child to begin associating the fact that the picture represents the actual object.  And it takes repetition for a child to understand that he/she is making a choice of what to play with!  You'll usually know when a child truly understands! 

On another note, did you notice the naked baby doll?  Yes, this is how the baby dolls in our classroom look 99% of the time...someone is always right there to pull the clothes OFF the baby...but there's no interest in actually putting them back ON the baby!

Tuesday, July 19, 2011

Relax, Breathe...Find Solutions!

I was watching a documentary the other day on PBS about young people traveling to various developing countries and attempting to work through some of the challenges of poverty using a business model.  Hmmm...interesting concept.  The documentary was very good.  What I took away from it most was a typed sign that hung near a person's desk space.  Here is what it said: 

Relax
Breathe
Find Solutions!
Immediately, I thought, I need that sign!  It definitely needs to hang in my classroom.  For anyone who has ever taught or worked with children with special needs (or adults, for that matter) most of our day focuses on finding solutions!
We find solutions for the child who wants to paint, but doesn't yet have the physical grip strength to hold a paintbrush.  We find solutions for the child who is overwhelmed by loud noises but wants to be right in the middle of all the action!  We find solutions for the child who is unable yet to communicate verbally with his/her peers but wants to greet his friends.  We find solutions for the child who is unable to stand, but longs to dance with his friends!   And, on and on!

So, yes, many times I think we simply need to..."Relax....Breathe....and work on Finding a Solution!" 

Monday, July 18, 2011

Wood Square Braille Addition!

After I finished making my wood square Braille letters, I realized that I really had left out a few things!  So, I went back and added these elements to the squares.  If you want to make these you will need: 
  1. Wood laminate free samples (I found these at Home Depot) or cardboard squares
  2. Puffy Paint
  3. Paper circle reinforcements

A Braille cell really consists of 6 dots.  I needed some way to represent the empty spaces of the Braille cell for the little guy who will be using these (since he is still learning about the Braille cell).  I decided to use the paper circle reinforcers for this.  You can feel the outline of the circle on the wood square, but it is much less noticable than the puffy paint dot.


The other thing I realized that I had forgotten was a way for someone who can't see the square to know if the square is "right side up"!  So, I added a puffy paint line on the top left hand corner of each square.


These additions, along with the letter written on the wood square for those of us who don't always remember the Braille letter, should complete the letter squares!  Now I just need to make a few more trips to Home Depot to complete the set!

Wood Square Letters, Numbers and Counting!

I knew I wasn't done with the ideas for these square wood pieces from Home Depot!  I have a little guy in my classroom who will be learning Braille.  I found these wood squares are perfect to place some Braille letters on with puffy paint!  If you want to catch up with the first idea I came up with for these go HERE.
Letters A,B,C and D in Braille
Of course, if you don't have a child learning Braille, you can use these to make counting squares or draw letters or numerals on them with puffy paint!  Now, for my purpose here, the different colors aren't relevant.  For a visual learner, though, you will probably want to get the same color wood laminate squares.

Letters E, F, G and H
The puffy paint adds a tactile dimension to the learning and the squares should hold up with regular use!  What a simple way to encourage children to match same number dots, count dots, match, recognize or name numerals or letters!  

*If you would like to make Braille letter squares, please read my follow up post...HERE!

Sunday, July 17, 2011

Wood Square Memory and Patterning

My multiple trips to Home Depot lately have paid off...I mean for preschool, as well as my home!  I came across these flooring samples (the wood laminate free samples) while looking for painting supplies for our kitchen.  As soon as I grabbed these, I began thinking of preschool! 


These are perfect for a visual discrimination game for the children.  Of course, the pieces will not be EXACT, but for children who are able to play memory already with exact pictures, these would be a great way to add some more natural aspects to the memory game.  They even have a tactile aspect as each match has a different texture.   (Of course, these aren't real wood, but they do have a semi-natural look and feel!)

Wood laminate samples turned over for Memory.
 For children who need to work on matching same item to same item, attach one of each of the samples to a board and provide the other samples to the child.  Encourage him/her to match the correct wood pattern to the match!


For children who need a bit more difficult work, provide various samples for the children to create patterns.  For those who are just beginning to understand patterning, attach samples in a pattern to a board.  Provide the rest of the samples for the children to extend the pattern!


What a great way to work on those visual discrimination skills, matching, sorting and patterning!  I'm pretty sure I haven't hit the end of the things that can be done with these samples!  I'm just not so sure how the people at Home Depot will feel if I come in and cart out a few dozen of these samples! :)  hmmm...might need to make a few more trips for my kitchen...might need a few more samples while I'm there!

Saturday, July 16, 2011

The Secret Preschool Training Program

My time has been occupied lately with some slow and messy home improvements.   The worst part was definitely removing wallpaper.  Yes, I know, I've been lucky that this is the first time in my life I have ever had to remove wallpaper. 

Now that the wallpaper is removed, though, I have found my true passion...spackling!  I've been a spackling fool the past few days!  It's awesome!  All those tiny holes in the wall from nails...poof...gone!  Areas that were...um...slightly damaged in the wallpaper removal....poof...gone again! 

Of course, there's probably not a whole lot of need for "professional spacklers."  But, I don't care, I've been having a ton of fun!   Why have I been telling my husband he has to fix minor wall problems all these years?  I'm clearly the expert (um...as much of an expert as one can be in this area, I suppose)!

And I think I know why!  It's all those years of playing with playdough, fingerpainting and all those general messy preschool activities involving huge globs of glue and various sticky items!

I've been in some secret training program in preparation for...SPACKLING!  Yes, I knew all those messy projects would come in handy some day!  Oh, I can barely contain my excitement...next I get to paint the walls!  You know, we do pull out the paint every day in the classroom.  Talk about an awesome training program.  Who knew... :)

Grab the "How Long is this Hall" Button!

HowLongisthishall?!
Related Posts Plugin for WordPress, Blogger...

Total Pageviews

Popular Posts