Saturday, April 30, 2011

Organizing All of our Stuff...Part VI

Here's a VERY quick and easy organizing idea I have used for a while in my teeny, tiny classroom!  No...really, my space is very limited in my classroom!  (I know...I know, I'm not the only one!)  I basically have a small corner of the classroom devoted to my desk and 2 shelves devoted to resource books and binders to organize all my information and paperwork!  

However, I often run out of space for all of the binders and books I have here.  I was constantly taking a binder down then accidentally putting it on another shelf!  Because of this, NOTHING would fit correctly...and I was, yet again, out of space. 


So I came up with a very quick way to make sure that I don't run out of space because I am unknowingly rearranging!  Basically, I've attached a colored sticker to my resource books and binders.  Red for the binders that belong on my desk, blue for the resource books and binders that fit on my shelf and yellow for the books and binders that belong on my large wooden shelf! 


This may seems silly, but it's worked for me!  When I start a new binder or add a resource book, I find a shelf that it will fit on and slap on a sticker!   This way, I know it definitely fit on a shelf at SOME point...so it's POSSIBLE to find a space to put it back on the shelf!  So, if you also are space-deprived and need to make sure there is space for books and binders, feel free to give this a try!  It won't make your classroom grow...but at least it will keep you from feeling like you are losing your mind!

If you would like more ideas on organizing, I've written just a few times about things I have organized. :)  So feel free to head over to:  Organizing All our Stuff...Part I, Part II, Part III, Part IV and Part V.

(For full disclosure:  I don't remember reading about this tip anywhere...but it's been sitting in my draft posts for so long that I can't be sure about this!  Please let me know if you've seen this tip out there somewhere so I can provide a link!)

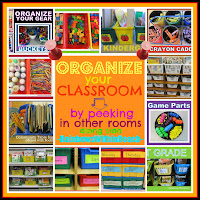
**This post is linked to Rainbows Within Reach classroom organization linkie!


photo of: Classroom Organization of Materials brought to you by RainbowsWithinReach

Friday, April 29, 2011

Lifelong Learning...Planning for Music Time!

As I sat down to write yesterday, I realized that I hadn't written about the in-service the teachers had with Miss Carol!  That in-service was what really motivated me to dive in and spend the time and money to transfer all of my school Cd's to one device!

There were several things that I learned from the in-service.  Of course, I already really knew many of these things; but a refresher course and a reminder is always handy!  Here are the main things that stuck with me:
  1. Children's music needs to be sung slower than most adult music.  Now, of course, I knew this.  But, how often do we, as adults, become bored and frustrated with the never ending repeated verses and sloooooow as molasses songs for children?!  Well, children really do process language slower than adults.  And for children who are just learning language or who simply process language much slower than their same-age peers; this is even more important!  I will continue to use music that is more easy to listen to for times such as lunch or centers.  If we want the children to listen, understand and attempt to sing, we really need to have music that is much slower.
  2. Carol stressed planning a SPECIFIC music time during the day!  Now, I've never done this.  I do use music throughout the school day and basically use music for every area including math, social skills, language, literacy, fine motor and gross motor!  But now I have a specific time slot for music.  The idea behind creating a specific music time makes sense to me.  We do need to convey the idea that music is important in it's own right! 
  3. Planning!  Actually using a planning sheet to prepare for music time.  To be quite honest, I've never done this even remotely!  Music has been an addition and a teaching tool, but I've never sat down and written out a lesson plan for a music time.  Well, now I have! 
I chose 3 very simple action songs to start with for the music time.  So, with our new planning sheet, song play-list ready to go and a time set aside specifically for music, we're on our way! 

Thursday, April 28, 2011

Musical Changes!

If you follow How Long is This Hall on Facebook, you know by now that I have spent a good portion of this week (my week off by the way) transferring all my classroom Cd's to the new MP3 player I bought!  This was no small task!  After sitting at my computer for nearly two days straight, I have now accomplished transferring all but about 5 Cd's which are still at school.  I also made a play list for our routine songs!   

I figured I'd give you a quick run down of how much this all cost and what I bought in case you are considering using an MP3 player rather than Cd's.
  1. I found a Sony MP3 player at Wal-mart for around $100.00.  This MP3 player has an external speaker built in.  For me, this was a huge selling point; as I can now use this as a motivational tool for a little guy in my room who HATES the transition from outside to inside...oh, and I'm sure we'll use it for other things as well!  Yes, he also LOVES music...so, you see where this is going don't you?!  As soon as he stands up to walk inside, we will play one of his favorite songs.  Perhaps this will help save my voice!  Now, this still sounds like a huge amount of money just for the classroom.  And it would be...but I plan on using this at home for my own music as well since it holds 10,000 songs (I transferred all of our Cd's for school and only took up a fraction of the space on this)....which leads me to the 2nd item I felt was a necessity...a case
  2. $10 generic case from Wal-mart (not the cutest...but will work!)
  3. $20 small iHome speakers. (for what we need this for, this should work well!)
What else did I get?  Well... a sore back from sitting at the computer for so long and a bit of a headache!  Hopefully, this is all worth it in the long run!   I'm so excited to be able to use the play list Monday and not have to jump up and down to put new Cd's in the CD player!

Wednesday, April 27, 2011

Ahhh...I SEE!...Visual Prompts Part 3: Schedules

Part 3: Visual Prompts-Schedules:

Feel free to read Visual Prompts Part 1 and Part 2 first if you would like to "catch up"!

In many preschool and Special Education classrooms, visual schedules are one of the most used visual prompt.  A visual schedule assists a child in understanding and anticipating the next activity or sequence of activities in the day. 

Here are some quick reminders I try to follow when creating individual visual schedules: 
  1. Keep the schedule manageable!  Break up the day into smaller segments and work on one section at a time.  Cover all but one picture if the child has difficulty attending to more than one picture at a time.  
  2. When helping the child use the schedule, preview the activity with the child..."It's center time"...Do the activity...Review the activity..."We're all done with center time".
  3. Attach the pictures with Velcro and have the child pull the picture off and place it in a designated envelope, pocket or basket to indicate that the activity is over.  You could attach Velcro directly to a table or board to use as a schedule or use cardboard, a small lap chalkboard or a metal surface with magnets instead of Velcro. 
  4. Place the schedule in an area that is convenient for you as well as the child.  If it is too difficult to find, you probably won't make use of it!
  5. You can use a schedule as a starting point for conversation as well.  ex. "I saw you playing with the big yellow ball outside today!" (while pointing to the picture that indicates outside play)
I have attached 3 pages of tag board together with a metal ring.  This way we can focus on only 3 activities in order at a time.  Each picture is attached to the page with Velcro.  In this way, we can simply have the child pull of the picture after they complete the activity.
Warning! be careful about overusing visual prompts with young children!
I actually try NOT to use visual prompts in many situations!  You want the child to notice as many "natural" prompts in the environment as possible. You want them to notice that their friends have gotten up from the table and are going to wash their hands...and that it is time that they also do this.


If they have become "prompt-dependent" and do not recognize that cue, but wait for you to show them the visual prompt before reacting; it is time to make use of more naturally occurring prompts in the environment and move away from some of the visual prompts. 


If the child is unable to function without the visual prompt and you feel like you are not making progress without it, but are going backwards instead; you can keep the visual picture prompt AND add a visual gesture to indicate the need to do something (pointing to the sink etc.) then fade out the picture over time until the child is able to recognize the natural cue with the gesture only.    

Having said that, there ARE some children (especially with ASD or Fragile X) that will CONTINUE to need visual prompts in order to be as independent as possible.  There is nothing wrong with continuing to provide visual prompts; simply be aware that you need to know the child very well in order to make the determination whether to continue using visual prompts or begin to fade them out.  For these children, you would not fade out the visual prompt; you would instead fade out the ADULT prompting with the visual aid.  The child would eventually be independently using the visual prompt to complete tasks.  HERE is an article explaining why visual prompts work so well with certain children and how to use them with children specifically with ASD.
This falls somewhere in between a visual schedule and visual prompt for social cues.  This is attached to the table so a child can point to the picture rather than using a verbal response.  This can be used with a child who has very limited language. 
Keep in mind, all of these visual prompts can easily be adapted for home use!  Many children benefit from knowing what will happen each day when they come home from school.  A simple way to accomplish this is to attach old magnets to the back of simple clip art or photo pictures of the activity (example: a photo the child eating a snack, a photo of the swing set to represent playing outside and a photo of a book to represent a quiet activity).  Then simply put several activities on the refrigerator in the order you will do them.  As soon as your child comes home, go to the refrigerator and review what you will do.  After doing each activity, have your child pull off the photo and place it in a basket to show that the activity is done.   Here is an example of how one family developed a schedule to use at home!  (Scroll down the photos to see the schedule!)


At some point next week, I will have a blog post ready about how to make and use a tactile object schedule with a child. (for children who are very young and do not yet respond to line drawings or photos or for children who have a visual impairment).  

Tuesday, April 26, 2011

Ahhh...I SEE!...Visual Prompts Part 2: Sequenced Tasks

Part 2: Visual Prompts for Sequenced Tasks:
Feel free to read Visual Prompts Part 1 first if you would like to "catch up"!

In order for visual prompts to be meaningful and useful, generally, the child needs to be able to attend to some degree to the visual prompt (either line drawings as shown in these photos or actual photos of the task), the child needs to have the physical and cognitive ability to complete at least parts of the steps shown (probably with some degree of assistance at first) and the child needs to be motivated by visual stimuli!

(*NOTE: Be careful, though, even though a child may not look like they are actually LOOKING at a visual prompt, they may be internalizing it! If the child does not seem to be looking, but is able to complete the step more independently with the visual than without it, continue using the visual prompt! The child is probably attending to it briefly.)
This is a visual prompt our SLP created for the classrooms to place in front of the tissue boxes!  This works well for children who already understand the steps involved in washing hands and simply need reminders to complete each step.
There are several ways you could go about teaching the steps shown in a visual sequence.  You could begin by showing only one step at a time, cover up the following steps and prompt the child verbally along with the visual prompt to complete one step at a time.  (at first, of course, you would need to provide assistance for each step).  This works well with very young children, children who resist hand over hand assistance or who have a strong desire to complete things independently; but struggle to understand the complete sequence.

Another way to teach the sequence is to simply provide hand over hand assistance (*see note below as well as link) to complete the entire sequence.  When the child is beginning to understand the sequence (probably several days or weeks later) begin reducing the hand over hand assistance and point to ONLY the first step in the sequence and verbally prompt as you provide assistance with each step.  Continue to reduce the amount of hand over hand assistance until you are simply pointing to each step and verbally prompting the child as the child completes each step independently.  Ultimately, you should not need to provide any prompting; the child should look at each visual prompt and complete each step independently.  (Children who tend to learn in a more "big picture" way tend to do better learning the entire sequence first and then going back and filling in the "details" of the individual parts).
This visual prompt breaks down each tiny step in hand washing!  These can be covered up with paper to show only one or two steps at a time.

The final way to present a visually sequenced skill is to use "backward chaining".  Provide hand over hand assistance for all steps the first few times; then provide hand over hand assistance until you get to the FINAL step in the sequence.  Point to that step and provide a verbal prompt with the visual; then assist the child only to the point that they will then be able to complete that last step on their own!  When they can complete that last step consistently and independently, add the second to last step...and continue going backwards until the child can complete each step independently.  (This method tends to work with many children as it provides assistance up until the point that the child will be successful.  The child continues to experience success each time!)

If the child begins to struggle with multiple steps, slow down and back up.  The goal is that the child will experience success with independence!  Also, be careful; don't assume that because the child can complete the last step they should be able to complete all the other steps independently.  Go slow and make sure the child has each step down before "letting go" and allowing the child to try another step independently.   It's not a race!  The goal is independence!  For many children, especially if you teach early childhood, YOU may not see the child completing all steps independently with only the visual prompts!  Just know that you set the foundation from which the child will continue to work as he/she gets older!   Without that foundation, it is very difficult to experience success with independence!

Feel free to stop back tomorrow for Part 3 :)
 (*A Note about hand over hand assistance:  Be careful to be respectful of the child when providing assistance.  Verbally let the child know that you will help them.  Treat this as two people performing the same sequence- or working together.)

Monday, April 25, 2011

Ahhh...I SEE!...Visual Prompts Part 1: Social/Behavioral Reminders

Part 1:  Visual Prompts for Social/Behavioral Reminders:

Around my classroom I have various visual prompts placed in strategic areas (both of the photos shown here are from our group time area).  Now, for the children in my classroom currently, these visual prompts really have just become a part of the room (for most of my children, we are just getting to a point where they would be useful).  However, for children I have previously had in the classroom, those same visual prompts were reviewed and gone over daily at various points in the school day.  For many children, these small reminders help the child become more independent and confident in his/her abilities. 
*Try starting with a black and white line drawing on a colored background as these are.
Make the size relatively large at first and add the words to the picture.  Example:  "sit on
bean bag chair","hands to self", "look".
All of the prompts shown were created using Boardmaker software.  If you don't have access to a software program to create these, you could certainly experiment with various clip-art or photos. 

If you are going to use photos, remember to place the object you are taking a photo of on a solid color background; as you want to avoid background clutter that may be confusing and distracting to the child.  If you are taking photos of people, be aware of the background.  If possible, stage the photo against a solid color wall or use a solid color tri-fold display stand.  When I take photos of objects, I simple place them on top of a solid black foam board and take a photo.

I haven't used these on this board for some time- but realized as I looked at this photo
that this is not the greatest place for the picture prompts!  These would
be very difficult for a child to attend to since there is so much visual distraction
beneath the pictures.  Take this into consideration when you are placing the pictures.

I just posted the visual prompts in the first photo for a little guy in my classroom currently. We have not yet used them...but will be soon!  For this particular child...and for many children, we will need to take just ONE prompt off the board and present it to him.  We will verbally remind him of the prompt "sit on bean bag chair" as we show him the picture prompt.  When he is pretty consistently responding to this, we will then simply point to the picture prompt on the board without removing it, and verbally remind him "sit on bean bag chair".   Eventually, we will probably be able to simply point to one of the prompts on the board to remind him. 

This offers a very simple and discreet way to help children remember simple social and behavioral rules!  In this way, the child can feel competent and part of the group while still working on some of those social and behavioral rules he/she may struggle to learn.

(*If you are interested in more information on visual prompts, stop back tomorrow for Part 2!)

Saturday, April 23, 2011

"Magic Beans"

Several weeks ago we planted various herbs and some bean plants in planters.  The hope was that we could put the bean plants outside against our trellis and allow them to climb to the top!  Apparently, we were lucky enough to buy some "magic beans" because these things just took off and have been growing like crazy!
And, of course, all would have worked as planned, IF spring would just arrive and STAY HERE!  Lately, we've had wonderfully warm spring days mixed in with very cold nights and days.  We even saw frost one morning. 
So, you can see my dilemma!  If I put these poor bean plants outside, one cold night will kill them for sure!  However, if I leave them on our windowsill much longer, I'm afraid they will seriously climb to our classroom ceiling!  And, as cool as this would be, I really think they would prefer to be outside!  So, here's to welcoming spring!

  Happy Earth Day...a bit late!             Happy Easter...a bit early! 

Thursday, April 21, 2011

A Musical "Macaroni Soup" Adventure!

Today we had a blast at a Macaroni Soup music event!  All of the children know and love the "Sticky Bubblegum" song and lots of the other songs that Miss Carole sings.  In fact, many of the children can sing them word for word without the CD! 
We enjoyed the Macaroni Soup presentation last year as well; so many of the children remembered the fun they had and were excited to sing and dance along!  They anticipated actions to songs and were more than willing to shout out answers to questions and correct the adults as they said silly things and forgot what sound a dog makes!
The children were hardly able to contain themselves as they sang along!  Then, when the puppets came out, there was squeals and giggles as the puppets did and said such silly things! 
But, the highlight just had to be the indoor snowball fight!  The children loved it just as much this year as they did last year!  The children threw their "snowballs" around the gym with gusto and "froze" perfectly as the music stopped!
Tomorrow, the teachers and teacher associates have a half-day in-service with Miss Carole!  I can't wait to see what we will learn!  I'm SURE it will be lots of fun!

Wednesday, April 20, 2011

Crunchy Carrot Painting!

We have been listening to the song 10 crunchy carrots by Charlotte Diamond this week.  To give us a visual as we're listening to the song, I attached 10 ACTUAL carrots to our flannel board with Velcro loops!  The children have been helping me take off carrots along with the song!   This has been a fun attention getter and visual prop to go along with the song.

Today, to extend this we decided to actually PAINT with carrots!  The children enjoyed exploring what they could do with carrot coins and large carrots.  They made lots of orange dots with the large carrots and used them to make marks on their triangle shaped paper.   After being shown how to make carrot "prints" with the carrot coins, one child also tried out this method of painting.
I am careful about what food objects we use for painting.  Most of the children in my room are not yet eating carrots and I wanted them to be able to explore more vegetables in at least some way.  I decided painting with them would be a good way to explore the vegetable in a way that did not include pressure to taste or eat it.

While we painted I made sure to emphasize the color word "orange" as well as the sign for orange (the link shows the version I use with the children).  "Orange carrots and orange paint!"  By the time we were finished, we needed to include; "orange hands!" 

This was a great way to introduce a new food item in a bit of a different and non-threatening way!  (don't worry- we plan to make carrot cupcakes later this week; so we will actually EAT carrots as well!)

I'm linking this post to the Sunday Showcase! (momto2poshlildivas.blogspot.com)

Monday, April 18, 2011

Windchimes and Tree Stumps!

Well, wouldn't you be shocked if I was blogging today about the cloning machine I invented over the last week!  Well, don't hold your breath, no luck with this just yet, but we've been exploring a few interesting things. 

Last week, my husband was kind enough to help me bring in some tree stumps for the children to sit on for our outdoor learning area (as the start of a large group area).  The children have had a huge amount of fun simply sitting and talking to their friends on these, playing musical instruments while sitting on them and, for one child, pretending to be an "owl!"  

(These are horribly boring photos- sorry- I'll try to get some photos of all of the materials we use while outside next time- still working on that cloning machine...remember :)

After our second day with the tree stumps, one of the children in Bumblebee Boulevard commented to his teacher, "We really like those things that we can sit on...you know, the things that someone made so they look like trees..." 

Umm...children, they are TREE stumps...they WERE trees!  Apparently, we will need to explore these items in a bit more detail so the children realize that these are actually trees that were cut down.  (After a storm brought the whole tree down, by the way!)

We've also worked on adding a very small and movable art station with a small easel, (and soon some clay and natural objects).  We've also begun adding to our music area, with handheld musical instruments and wind chimes.  All of these are items that can be stored in a shed when not in use since we do have an issue with things disappearing while school is not in session. 


To attach the wind chimes and easily remove them, I simply hooked together a zip-tie to form a loop.  I then attached several small plastic links, attached the wind chime and hung it on the side of our "tree house".  To remove it, we simply open up the link and put the whole thing away in the shed. 

We're still working on finding a shelf to slide in the shed for our loose materials; but until then, we've had a blast introducing the new items to our outdoor area!

Sunday, April 10, 2011

Wanted: Cloning Machine

While I'm sure if I lived inside my t.v. with the cartoons, I could quickly clone myself and my teacher associate with some ingenious cloning machine some cartoon villain uses; but out here in the real world, I haven't found I'm able to do this!  Now, forget about any moral issues surrounding cloning humans; I'm just interested in having enough hands to meet the needs of the little guys in my classroom currently!

We're down one teacher associate.  While things are still going smoothly and calmly for the most part, I've gone home extra tired and have had more muscle aches than usual.  I suppose that may be because I spend 90% of my day in a hunched over position assisting children, sitting in little tiny chairs and sitting on the floor!  I know, I know, I'm not the only one!  It just makes it even more noticeable when we are missing an adult!  Just imagine if I was actually a TALL person!  Yikes, this would be even more painful!

So, for now, our activities require all hands on deck!  I haven't been able to take photos of activities because of this...so, no new blog posts!  I think I have things balanced pretty well for next week, so I should be able to sneak some blogging in there somewhere!  But if you don't see me here for a bit, you'll know it's because I'm out there searching for that cloning machine! 

Wednesday, April 6, 2011

Post-It Rubrics!?

Previously, I've written about IEP goals and creating rubrics for these goals.  I thought I'd share a VERY quick and easy way that I have begun using to visualize these rubrics BEFORE I actually begin creating them in a document.

There is no significance to the colors- I simply ran out of one color! :)  And, of course, it is just "chicken-scratch"- not full sentences on these post-its...but I understand what it means, that's all that matters! :)
Post-its are such a visual tool!  I simply chose three items the child needs to focus on within the standard.  I wrote those three items on the post-its on the first column and then worked my way to the right from most assistance to least assistance.  The columns are scored 1,2,3 and 4 for a total of 12 points on the rubric. 

Now, of course, these are just a VERY rough draft and will probably be changed several times before we meet as a group and then again when we do meet as a group; but this gives me a good base to start from and a way to visualize the rubric and rearrange it as needed before I actually create it. 

Tuesday, April 5, 2011

A Fish Tale!

I decided it was high time to bring back a fish tank to the classroom!  After a little fiasco with a child dumping our previous fish tank (water, rocks and fish included) I am just now mustering up the courage to bring back fish!  (the fish are very, very afraid though :)
I decided we would take the time to have the children involved in setting up the fish tank before we added fish!  I wasn't quite sure how this would go, since I've never had the children actually work to set up the tank!  Before we started the process, we talked about the empty fish tank on the table next to us!  Our morning message for the day was:  "Today we will make a fish home!"   
Later, all of the children worked to rinse the small rocks, blue gems and plants for the fish "home".  As we worked, one child put his hands in the water and actually said, "Fish home."  We had been talking more at that point about washing the rocks, so I was surprised he remembered that we were washing them for the fish home!    
I wish I could post some of the pictures of our little guys' faces here!  Some of us were just THRILLED to be able to splash in the water!  After we rinsed the items (and splashed) for at least 20 minutes, we drained the water and several of the children helped transfer the rocks to the fish tank!  This ended up being a great way to get the kids involved in preparing the fish tank!  I'm sure those fish will be happy to see such a nice clean "home" prepared for them!   Now, if only we can keep that fish home upright rather than on the floor this time!

Sunday, April 3, 2011

Project Work Workshop

Yesterday another teacher and I attended a workshop on project work in our area.  Imagine my surprise when another teacher brought over someone who apparently knew me from this blog :)  Here was my reaction: "Are you sure you're talking about MY blog!"  Well, after the initial shock that, yes, indeed, it was my blog she was talking about, we had a great day learning more about project work.  Dianne operates a home daycare in our area and has some outdoor learning/nature classroom ideas of her own!  Hopefully, we will hear more about Dianne's outdoor transformation as well! 


Back to the workshop:  We were able to hear from Lillian Katz and Judy Helm on project work, children's learning and documenting children's work.  We viewed projects that other classrooms had done and were able to break off into groups in order to focus at a more in-depth level on specific issues.  We also had an opportunity to view the Children's Campus classrooms and see some of the projects they were involved in with the children.  If you would like to learn more about project work, click on the link; you will be able to follow a project from start to finish!


I've always struggled to do anything close to a true project with my current classroom.  We have so many unique learning styles, challenges and very limited language.  This isn't to say that we aren't learning!  We certainly are.  We just have more difficulty expanding on and verbalizing our learning.  My classroom also tends to have different challenges going on at the same time!  While one child needs to explore by actively engaging in many different sensory experiences; another child struggles with sensory experiences and needs gradual exposure to items.
Even so, I keep thinking that there are parts of project work that I can utilize within the classroom.  It would be nice to be able to tie together learning in a way that is more meaningful and interesting to the children.  Unfortunately, there is rarely something that is of interest to ALL the children!   I will have to keep this in the back of my mind for now, and experiment with how this could work in my classroom.   

Whether I'm able to utilize this in my own classroom for now or not, this was a beneficial workshop.  Hopefully, at some point, I will be able to figure out a way to take pieces of this to use in my own classroom!

Grab the "How Long is this Hall" Button!

HowLongisthishall?!
Related Posts Plugin for WordPress, Blogger...

Total Pageviews

Popular Posts