Part 3: Visual Prompts-Schedules:
Feel free to read Visual Prompts Part 1 and Part 2 first if you would like to "catch up"!
In many preschool and Special Education classrooms, visual schedules are one of the most used visual prompt. A visual schedule assists a child in understanding and anticipating the next activity or sequence of activities in the day.
Here are some quick reminders I try to follow when creating individual visual schedules:
Warning! be careful about overusing visual prompts with young children!
I actually try NOT to use visual prompts in many situations! You want the child to notice as many "natural" prompts in the environment as possible. You want them to notice that their friends have gotten up from the table and are going to wash their hands...and that it is time that they also do this.
If they have become "prompt-dependent" and do not recognize that cue, but wait for you to show them the visual prompt before reacting; it is time to make use of more naturally occurring prompts in the environment and move away from some of the visual prompts.
If the child is unable to function without the visual prompt and you feel like you are not making progress without it, but are going backwards instead; you can keep the visual picture prompt AND add a visual gesture to indicate the need to do something (pointing to the sink etc.) then fade out the picture over time until the child is able to recognize the natural cue with the gesture only.
Having said that, there ARE some children (especially with ASD or Fragile X) that will CONTINUE to need visual prompts in order to be as independent as possible. There is nothing wrong with continuing to provide visual prompts; simply be aware that you need to know the child very well in order to make the determination whether to continue using visual prompts or begin to fade them out. For these children, you would not fade out the visual prompt; you would instead fade out the ADULT prompting with the visual aid. The child would eventually be independently using the visual prompt to complete tasks. HERE is an article explaining why visual prompts work so well with certain children and how to use them with children specifically with ASD.
Keep in mind, all of these visual prompts can easily be adapted for home use! Many children benefit from knowing what will happen each day when they come home from school. A simple way to accomplish this is to attach old magnets to the back of simple clip art or photo pictures of the activity (example: a photo the child eating a snack, a photo of the swing set to represent playing outside and a photo of a book to represent a quiet activity). Then simply put several activities on the refrigerator in the order you will do them. As soon as your child comes home, go to the refrigerator and review what you will do. After doing each activity, have your child pull off the photo and place it in a basket to show that the activity is done. Here is an example of how one family developed a schedule to use at home! (Scroll down the photos to see the schedule!)
At some point next week, I will have a blog post ready about how to make and use a tactile object schedule with a child. (for children who are very young and do not yet respond to line drawings or photos or for children who have a visual impairment).
Feel free to read Visual Prompts Part 1 and Part 2 first if you would like to "catch up"!
In many preschool and Special Education classrooms, visual schedules are one of the most used visual prompt. A visual schedule assists a child in understanding and anticipating the next activity or sequence of activities in the day.
Here are some quick reminders I try to follow when creating individual visual schedules:
- Keep the schedule manageable! Break up the day into smaller segments and work on one section at a time. Cover all but one picture if the child has difficulty attending to more than one picture at a time.
- When helping the child use the schedule, preview the activity with the child..."It's center time"...Do the activity...Review the activity..."We're all done with center time".
- Attach the pictures with Velcro and have the child pull the picture off and place it in a designated envelope, pocket or basket to indicate that the activity is over. You could attach Velcro directly to a table or board to use as a schedule or use cardboard, a small lap chalkboard or a metal surface with magnets instead of Velcro.
- Place the schedule in an area that is convenient for you as well as the child. If it is too difficult to find, you probably won't make use of it!
- You can use a schedule as a starting point for conversation as well. ex. "I saw you playing with the big yellow ball outside today!" (while pointing to the picture that indicates outside play)
 |
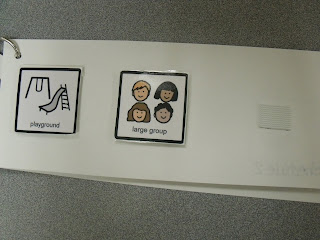
| I have attached 3 pages of tag board together with a metal ring. This way we can focus on only 3 activities in order at a time. Each picture is attached to the page with Velcro. In this way, we can simply have the child pull of the picture after they complete the activity. |
I actually try NOT to use visual prompts in many situations! You want the child to notice as many "natural" prompts in the environment as possible. You want them to notice that their friends have gotten up from the table and are going to wash their hands...and that it is time that they also do this.
If they have become "prompt-dependent" and do not recognize that cue, but wait for you to show them the visual prompt before reacting; it is time to make use of more naturally occurring prompts in the environment and move away from some of the visual prompts.
If the child is unable to function without the visual prompt and you feel like you are not making progress without it, but are going backwards instead; you can keep the visual picture prompt AND add a visual gesture to indicate the need to do something (pointing to the sink etc.) then fade out the picture over time until the child is able to recognize the natural cue with the gesture only.

Having said that, there ARE some children (especially with ASD or Fragile X) that will CONTINUE to need visual prompts in order to be as independent as possible. There is nothing wrong with continuing to provide visual prompts; simply be aware that you need to know the child very well in order to make the determination whether to continue using visual prompts or begin to fade them out. For these children, you would not fade out the visual prompt; you would instead fade out the ADULT prompting with the visual aid. The child would eventually be independently using the visual prompt to complete tasks. HERE is an article explaining why visual prompts work so well with certain children and how to use them with children specifically with ASD.
 |
| This falls somewhere in between a visual schedule and visual prompt for social cues. This is attached to the table so a child can point to the picture rather than using a verbal response. This can be used with a child who has very limited language. |
At some point next week, I will have a blog post ready about how to make and use a tactile object schedule with a child. (for children who are very young and do not yet respond to line drawings or photos or for children who have a visual impairment).


Pam,
ReplyDeleteI enjoy reading your posts, you really have such a great knowledge. Thanks for sharing all this.
I do find helpful your point about not overdoing visual prompts.
Brenda
Brenda- I'm glad these are coming in handy for you! I think I get a bit wordy with these posts, but there is SO much I would have loved to have known when I began needing to use these types of tools with children! I figure someone else may want to know these things as well. :)
ReplyDelete