Showing posts with label painting. Show all posts

Monday, October 10, 2011

Nature Paintings

The other week we took a short nature walk.  We pushed our small wooden doll carriage along with us and filled it with all sorts of natural items we found along our walk.  We found twigs, large sticks, twigs with leaves attached, leaves, acorns, rocks and even bark from a tree. (it had fallen off the tree)


When we came back to the classroom we literally just dumped our collection into the empty sensory table to explore.  Several days later one of the little guys in my room brought some leaves inside from the playground and asked to put them "in".  Of course, those leaves were plopped inside the sensory table as well.


The children explored these items a bit, but weren't thrilled with them (I think they may have found them 'out of place' in the classroom).  Over the weekend, I grabbed some tiny pumpkins and gourds to add to the table. 


We decided it was high time we explore painting with our Autumn items.  We pulled out the pumpkins, the gourds, the leaves (some that were by now, quite dry) some twigs with leaves attached, rocks and acorns.


We added orange, red and yellow  paint in shallow containers and began to explore.  The adults modeled how to make pumpkin "prints" by holding the tiny pumpkins by the stem and dipping them in paint. 
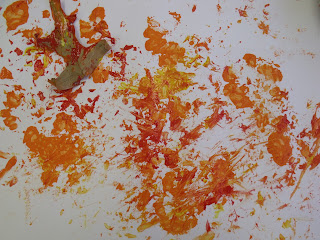

We explored dipping leaves and acorns in paint and swirling and tapping them on the paper.  We spent time exploring each object and how it interacted with the paint.  Later we may add some of our colored glue to stick items down.  We may also decide to use paintbrushes to actually paint directly on the pumpkins!  But, for now, we explored using these items as paintbrushes themselves!


We'll be off on another nature adventure later this week.  I can't wait!  Oh, did I tell you.  We found a snake on our first walk!  We were quite excited, though it was too fast to take a picture of!

This blog post is linked to the blog hop on Rainbows Within Reach! 

Tuesday, August 23, 2011

Glue "Puddles!"

The children thoroughly enjoyed exploring colored glue today!  Because many of my children have not yet had the chance to explore glue, I basically just offered them index cards (thicker and will hold up to the massive amounts of glue the children want to use), colored glue and foam shapes and letters to stick on the glue.
I also provided old paintbrushes for the children to brush the paint on the index cards if they preferred.  The small cups that were holding the foam shapes and letters suddenly were overturned by one little guy since he simply needed MORE space to make glue "puddles!" 

And for some of the kids, the foam shapes were simply discarded on the table and never touched at all!  The real excitement was over squeezing endless amounts of colored glue!

And at some point I realized that we had gone from making glue puddles in the cups to exploring color mixing in the cups!


One little guy took a few brief breaks from squeezing glue to shake and rub his arm and complain that it hurt!!  You know you are squeezing a lot of glue when your arm hurts!


Of course, we had some who felt that covering every inch of the index cards with letters was the way to go.  So, those discarded letters on the table were used up after all!


We actually pushed back our rest time by 15 minutes today because there was NO WAY I was going to stop the kids when they were so involved and focused on this activity!


Believe it or not, we do actually have colored glue left in the bottles!  We also covered the glue puddles in the cups and are hoping they will still work tomorrow.  So, I've promised that the colored glue will be out again tomorrow!  After that, I'm pretty sure I will need to make some more!  At the rate the kids are using the glue, we have about one more day left!

Thursday, August 18, 2011

Colored Glue Spin Art!

Every once in a while there are those great accidental combinations in our world; peanut butter and chocolate comes to mind!  In my world colored glue and spin art came together; and boy was it a combination!  (If you keep reading, and you've heard of this before, please let me know!  I have never heard of this combination...and I was pretty excited!)


After I wrote about record player art with markers, several people suggested spin art on the record player.  I just couldn't figure out a way to keep the paint contained!  Silly me!  There's no need to cut out the bottom of a bowl or bucket, just create a large cone to go INSIDE the bowl...or a flat piece of paper for the bottom of a bucket.  The record player will turn the entire bowl or bucket as long as it is attached somehow to the turntable!  (Obviously, the only difference with the two is that the glue will drip to the center of the cone!)


So I began experimenting!  I started a hole with an Exacto knife in the bottom of a dollar store bowl.  I then used a screwdriver to make the hole large enough to fit over the record player spindle.  I cut several circles out of white paper and cut a slit from the edge of one side of the paper to the middle.  I rolled the paper to create a large cone and taped it shut.  I then taped the paper to the inside of the bowl. (As we go, I also may attach a strip of Velcro to the bottom of the bowl and the turntable to keep the children from pulling the bowl off the turntable)
The bowl with a hole in the bottom to attach it to the record player.
Now was the time to experiment with paint.  But...wait; I had just made four bottles of colored glue with tempera paint and glue!  Hmmmm....I couldn't figure out any real reason why we COULDN'T use colored glue.  In fact, it may be an even more interesting experiment as it dries, as the glue will dry in bumps and textured lines on the paper!


So, I began squeezing various colors in the bowl.  It was a wonderful experiment....and I am POSITIVE the children will enjoy this tomorrow!  I think they'll also enjoy the textured finished product as it dries!  I'm not so sure it will go down in history as a combination as incredible as peanut butter and chocolate.  But in my room, it ranks right up there with the best of them!

Sunday, July 24, 2011

Remote Control Bumblebee Painting!

I spent today painting my kitchen.  I figured since I have painting on the brain today; I'd tell you about a painting activity I plan on doing with the kids when I get back to school. 


I have this cute little bumblebee.  It's actually a remote control bumble bee.  I put some paint in a large cardboard box top and let the bumble bee move around the box!  (The kids in my room will love this :)


This is one of those ways to make painting easier for children who may not be able to hold a typical paint brush!  Pushing the button on the remote control activates the bumblebee.   This also offers children a way to interact and attend to the same activity without needing to follow very specific directions; since this is very open-ended.


I'm sure you could use any type of remote control.  This bumblebee, however, has very large tires which did seem to help with the painting!  I would try the painting out first with a small amount of paint and make sure it didn't somehow ruin the remote control mechanism.  It didn't seem to harm this one!  I also plan on adding the ladybug from our ladybug painting to the box at the same time at some point!  I can't wait for the craziness this produces!

The children in my room will definitely like this remote control bumblebee painting!  We'll just have to have a bug painting party!

Tuesday, June 7, 2011

Ladybug Painting!

I bet you've always wondered what "Ladybug Paintings" would look like!  No...you haven't?!  Well, we decided to spare the real ladybugs the embarrassment of having their feet painted; and we used our ladybug back massager as our painting tool! 


The children each took a turn choosing red or yellow paint, dipped the ladybug feet in the paint, pushed the button and watched the ladybug jiggle, wiggle and "paint" the paper!  


We watched as the ladybug mixed and stirred the red and yellow paint together to make orange and, a few times, had to work to keep the ladybug from cruising right off the side of the paper! 


I'm still working on a way to keep the ladybug feet holding a bit more paint each time!  The children did enjoy watching the ladybug bounce around and paint, but I think it will be even more fun if we add a few more bouncing bug back massagers to paint at the same time!  Hmmm...we'll have to save that for another day!

The closest thing to this that I can remember seeing on the Internet is Teacher Tom's Drawbots (Of course, I may be forgetting that someone has already done this- If so, I'm sorry, please let me know!)

I am linking this to Nurture Store's Play Academy idea swap!
 

Sunday, May 22, 2011

Muddy Animals!

We have done a number of activities recently to go along with the book Mrs. Wishy Washy.  In the book, the animals jump and roll and stomp in the mud and poor Mrs. Wishy Washy has to get them clean.

So, of course, we had to do the same with our pretend animals!  We used brown paint for the mud and danced, rolled and stomped our own animals in the "mud". 

The children then enjoyed washing the animals in tubs with water, dish soap and various sponges from the dollar store.

Mrs. Wishy-Washy has really has been a bit of a "break-through" book for one of my little guys.  After reading this book for about three days, he began to be able to help "read" parts of the repetitive rhyme with me!  This was such a huge step for him!  He was so proud of himself when I would pause and let him fill in the last word of the sentence!

Monday, May 16, 2011

"Scrubber" Prints!

We have been having a ton of fun reading the book "Mrs. Wishy Washy" and "Splishy Sploshy" (both by Joy Cowley).  We've also listened to the song "The Wishy Washy Washerwoman" (on Baloney by Carol Peterson)!

After spending last week exploring scrubbers and sponges with soap and water to wash dishes and our animals; today we explored painting with the scrubbers!


We found very quickly that the round scrubbers made perfect round bubbled prints!  Depending on how much paint the child used and how much was previously on the scrubber, the circle was wide and bubbly or thin and perfectly symmetrical!


We also used bath "poufs" which didn't work quite as well for prints, but were lots of fun to scrub across the paper (or hands!)

Thank goodness we chose to tape large paper on the table!  Our scrubber circles were lots of fun, but they sure took up a lot of space! 

Wednesday, April 20, 2011

Crunchy Carrot Painting!

We have been listening to the song 10 crunchy carrots by Charlotte Diamond this week.  To give us a visual as we're listening to the song, I attached 10 ACTUAL carrots to our flannel board with Velcro loops!  The children have been helping me take off carrots along with the song!   This has been a fun attention getter and visual prop to go along with the song.

Today, to extend this we decided to actually PAINT with carrots!  The children enjoyed exploring what they could do with carrot coins and large carrots.  They made lots of orange dots with the large carrots and used them to make marks on their triangle shaped paper.   After being shown how to make carrot "prints" with the carrot coins, one child also tried out this method of painting.
I am careful about what food objects we use for painting.  Most of the children in my room are not yet eating carrots and I wanted them to be able to explore more vegetables in at least some way.  I decided painting with them would be a good way to explore the vegetable in a way that did not include pressure to taste or eat it.

While we painted I made sure to emphasize the color word "orange" as well as the sign for orange (the link shows the version I use with the children).  "Orange carrots and orange paint!"  By the time we were finished, we needed to include; "orange hands!" 

This was a great way to introduce a new food item in a bit of a different and non-threatening way!  (don't worry- we plan to make carrot cupcakes later this week; so we will actually EAT carrots as well!)

I'm linking this post to the Sunday Showcase! (momto2poshlildivas.blogspot.com)

Friday, March 25, 2011

Wobbling Around...Wobble Painting!

So, I found this great idea for "wobble painting" at specialclassroom.blogspot.com.  For children who aren't able to physically hold a paintbrush, "wobbling" a bowl around can make for a great painting experience!  I used several plastic bowls, taped the rounded tops of plastic salt and pepper shakers to the bottom of each bowl and created our painting experience!
We used blue and green paint, paper cut in circles to fit the bottom of the bowl, tiny "porcupine" balls, cat toys with bells inside and tiny egg shaped "porcupine balls.  The children twirled the bowl, wobbled it by batting at it, held it in their hands and rocked it back and forth and experimented with how fast they could spin it and then how high they could make the balls go around the lip of the bowl before they threatened to fly out!  (Those would be our Bumblebee Boulevard friends!)   I'm seriously considering covering the bowls with plastic wrap next time so the kids can twirl the bowl as much as they want without having the ball fly out...although that may take away a bit of the fun...and, of course, would take away a bit from the scientific experimentation! 
Now, of course the little guy I REALLY wanted to experiment with this the most was struggling to stay awake at this point, so we will have to try this again next week with some different colors! 

It was interesting to note that each finished painting was so unique!  The colors blended together to create a kind of "earth" look!  The children that only used the porcupine balls had paintings with tiny specks of color throughout (left photo)!  The children who had the bell balls as well as the porcupine balls had smoother paintings with more even color!  I can't wait to try this again!  We may have to try some different variations on this activity; I'm sure the kids will be up for more experiments with wobble painting!

Monday, February 28, 2011

Paint-Dancing!

Today we began listening and reading the story "Abiyoyo."   After we listened to the story, we decided to 'paint-dance'!  Of course, this would be a version of the dancing that Abiyoyo does in the story; we just added paint to the mix!


We each positioned ourselves with two paintbrushes each, turned on some music, and had those paintbrushes "dancing" across the large paper taped to the table!  Some of us danced fast.  Some of us danced slowly!  Some of us danced with the paint side by side...but MOST of us danced with the paint swirled together!

Some of the children watched carefully as we used the brushes to swirl the paint in circles and make "feather" painting with the brush almost dry.  The children all stayed interested in this group painting project for more than 20 minutes! 

We enjoyed this project so much, that it may take several days for the finished group project to dry!   I think we may try this again sometime with different colors!  The children really enjoyed the open-ended aspect of this project.  And, of course, who doesn't like painting with TWO paintbrushes?!
Oh, yes, and some of us threatened to dance those two paintbrushes right on our teacher's head!   

Tuesday, February 8, 2011

Valentine's Day Heart Roller Stamps

I found these wonderful heart roller stamps at Micheal's.   They were $1.50 a piece and a GREAT deal!  We tried them out today during center time, along with sheets of pink paper taped in a long strip around the table.  This way the children could stand and actually walk all the way around the table while rolling!  What fun is THAT!    
We used purple and red ink to stamp with.  The children did need a bit of assistance pressing down hard enough to soak up enough ink to make a long print.
We also attached some thick foam tubing to the handles of the rollers since originally the handles were very flat and a bit difficult to hold on to. (The foam tubing is often used to help children or adults who have difficulty with strength and fine motor skills hold on to paintbrushes/ toothbrushes etc.)  You can find the foam tubing through Beyond Play or simply use Styrofoam tubing (this is what we used on these).   
When the children grew tired of using the heart rollers we brought out the pipsqueak markers to color with!  (The pipsqueak markers are much shorter than regular markers and better for small hands to hold and work on those fine motor skills)

This was a great activity that I think we might pull out again some day soon!  I think next time, though, we may just cover the ENTIRE surface of the table with paper as some of our children found it very interesting to roll the stamper in the MIDDLE of the table...or color with marker in the middle of the table!

Tuesday, February 1, 2011

Paint Cup Tip

Many years ago, I found the absolute perfect paint cup/water cup for painting and watercolors.  I happened to eat a certain brand of yogurt at the time, that came with a small cup attached to the top with granola or M&M's.  Probably not the healthiest yogurt, but it was pretty darn good tasting!
I ate these every day for probably more than six months before I realized that these small plastic cups could come in very handy!  Before this, they were routinely thrown in with our recycling. 

We found that these are simply the perfect size to hold enough paint to paint with, but not so much that the paint is wasted or needs to be covered for another day.  This is the reason I have always detested the larger paint cups that are sold for this purpose!

These cups have such a broad opening and flat bottom that the children can easily see and reach the paint or water with their paintbrush, but it is nearly impossible to spill the paint or water!  These are especially handy for holding water for watercolor painting!  If, by some chance, the water does spill, it is such a small amount, that it is very quick to clean up and refill the cup! 

Grab the "How Long is this Hall" Button!

HowLongisthishall?!
Related Posts Plugin for WordPress, Blogger...

Total Pageviews

Popular Posts