ahhh...spring break and some spring cleaning! Will post again next week!
Tuesday, March 29, 2011
Monday, March 28, 2011
Visiting a Nearby Outdoor Classroom
We've struggled a bit to get moving with developing our outdoor classroom. While we have a great base; we just needed a bit more "umph" and some nice warm weather like we have been having currently, to get going! The other day, another teacher and I made a little trip to an early childhood center not far from our location. The Children's Campus is already Nature Classroom Certified and has done a great deal of the foundation work for this that we are just beginning. All of the photos below come from their Nature Classroom. Keep in mind, it is still a bit cold here- so no plants are really visible on these photos!
We were able to get a very good idea of what we could realistically do! Because they are located in the same area we are, we know we will need to follow similar safety guidelines. Seeing what they have done, what large items they have purchased and how they have stored items was invaluable!
Since our visit, we have brainstormed a "dream plan" :) of large and small items I believe we could collect, make or have made for us, have donated or may need to purchase. We are sending home letters to parents to get more input and awareness about the project, as well as funding. We need to develop more of our loose parts/building area. We need to continue to expand on our music area. We need to develop an art area and a group time area! I know, I know...we're just starting with small areas first!
One of our big projects that we want to begin soon is developing a garden! We've had small garden plots in the past for the children, but we've never had one right next to our outdoor learning area. Locating directly outside of our area would be ideal as it would give very easy access and the children can be directly involved in every process on a daily basis!


 |
| Their Group time Area. We are planning to buy the same cedar benches as these. |
 |
| Their Loose parts/building Area |
 |
| Their Music Area |

One of our biggest challenges with all of this is reducing the amount of vandalism that occurs with any loose items. Generally, anytime we put something that is not securely attached and padlocked outside, it will disappear before morning (something the above pictures of the other center do not show- as they do not have this issue).

I've also done some brainstorming on this issue. We have several "trike storage sheds". These are long and low. I think we could slide a shelf directly into one of these with all of the loose parts/ or an art shelf on it. Before we come out, one of us would need to go out, and literally "re-design" the outdoor area! We would need to pull shelves out of sheds, loose items for dramatic play, loose parts for building, an art shelf, hand held musical instruments, colored cloth and more. It does sound a bit daunting, but if this is something we value, this is most likely the way we will need to do this! Also, if we are spending at least 60 min. outdoors daily with the children this makes it worth our time to re-design daily.
 I will post as we begin developing an area! I can't wait to begin our collection of loose parts (and I'm sure the children will find this wonderful as well), find an unused shelf and see if my idea of sliding this into the trike shed will work! I'm on Spring Break right now, so my idea will have to wait until next week! I'll be back next week sometime with an update!

Saturday, March 26, 2011
Shower Caps at the Sensory Table?!
I just finished reading Teacher Tom's post on "hair painting" and it reminded me of two children I had in my classroom! Generally, the children in my classroom will occasionally go home with paint or sand in their hair. But because we tend to have a few sensory challenges, many of the children don't explore these mediums as often or as intensely as some children will.
Some, though, LOVE to fully play in sand or paint EVERY nook and cranny of paper or a box! I had a little girl in my room several years ago who absolutely LOVED sand in the sensory table! She would explore sand longer than any other activity we introduced!
Unfortunately, she also wore her hair in very tight braids, and her mom was NOT thrilled when she began coming home with sand in her hair every afternoon. Well, we couldn't just ban her from the sensory table! I also could see mom's point...this was not easy to remove from her hair without removing every single tiny braid!
It took me a bit of brainstorming to figure out how to handle the situation. But, eventually I hit on the idea of having her wear a shower cap while playing at the sensory table! Wouldn't you know it, this little girl was perfectly fine with this solution! She continued to enjoy exploring sand each and every day, and she didn't go home with sand in her hair! (and she looked pretty darn cute with a different colored shower cap on each center time)
The second child LOVED painting! She loved painting so much that she went home with purple, green, blue or red hair nearly every day! This child's parents thought this was creative, wonderful and expressive! Her mom would come in each afternoon and ask what color her hair was that day! She knew that the paint would wash right out in the bath and was thrilled that her daughter was expressing her creativity! (this child's hair was very light in color and the paint would come right out with simply water)
Two completely different parenting views...but each valid. Of course, I encourage parents not to send children to preschool in their best clothes! I warn them that their child WILL get messy. I remind them that THIS is what preschool is for...to explore and learn through action! Then there are times I have to remind myself that I can use all that energy to come up with a solution that will allow for all to be happy with the outcome. The solutions that allow for the child to continue exploring are always going to win out in my book!
Friday, March 25, 2011
Wobbling Around...Wobble Painting!
So, I found this great idea for "wobble painting" at specialclassroom.blogspot.com. For children who aren't able to physically hold a paintbrush, "wobbling" a bowl around can make for a great painting experience! I used several plastic bowls, taped the rounded tops of plastic salt and pepper shakers to the bottom of each bowl and created our painting experience!
 We used blue and green paint, paper cut in circles to fit the bottom of the bowl, tiny "porcupine" balls, cat toys with bells inside and tiny egg shaped "porcupine balls. The children twirled the bowl, wobbled it by batting at it, held it in their hands and rocked it back and forth and experimented with how fast they could spin it and then how high they could make the balls go around the lip of the bowl before they threatened to fly out! (Those would be our Bumblebee Boulevard friends!) I'm seriously considering covering the bowls with plastic wrap next time so the kids can twirl the bowl as much as they want without having the ball fly out...although that may take away a bit of the fun...and, of course, would take away a bit from the scientific experimentation!
 Now, of course the little guy I REALLY wanted to experiment with this the most was struggling to stay awake at this point, so we will have to try this again next week with some different colors!

It was interesting to note that each finished painting was so unique! The colors blended together to create a kind of "earth" look! The children that only used the porcupine balls had paintings with tiny specks of color throughout (left photo)! The children who had the bell balls as well as the porcupine balls had smoother paintings with more even color! I can't wait to try this again! We may have to try some different variations on this activity; I'm sure the kids will be up for more experiments with wobble painting!


It was interesting to note that each finished painting was so unique! The colors blended together to create a kind of "earth" look! The children that only used the porcupine balls had paintings with tiny specks of color throughout (left photo)! The children who had the bell balls as well as the porcupine balls had smoother paintings with more even color! I can't wait to try this again! We may have to try some different variations on this activity; I'm sure the kids will be up for more experiments with wobble painting!
Tuesday, March 22, 2011
Flannelboard Fun!

Last week we spent time listening to the book "Jump, Frog, Jump!" Not only did we listen to this book on tape, but we also used our flannel board pieces with the story. Since these flannelboard pieces are made in such a unique way I thought I would share how I made them! Keep in mind: This is not the EASIEST way to make flannel board pieces! It takes a bit of time, but, in the end, the pieces tend to look very pleasing and hold up very well! I originally learned this from another teacher while I was in college; and have since made many sets of these for various books.

In order to make flannel board pieces this way, you will need access to a farm implement store (in our area that is Farm and Fleet). You will find milk filters somewhere in this store (I would suggest just asking someone). These are large round sheet filters. They are fairly large (probably about 24 inches in diameter- can't give exact measurements- I don't have any with me- but here's a picture!) You will be able to make several flannel board pieces out of one milk filter.


When you have the basic shapes drawn, you will need to go back and color these in with markers or colored pencils. I have found that the effect of colored pencils is quite unique and gives a very soft effect to the pieces. You do not need to use any Velcro or flannel on the back of these. The filters themselves simply stick to the flannel board.


If you dislike drawing or coloring, this probably isn't the project for you! But, if you have a bit of time, and want to try a unique way to make flannel board pieces, this is a great project to try! This also may be a nice way to allow children to explore making their own flannel board shapes to use!

Just be prepared for a few odd looks when you explain to the people at the farm implement store that you DO NOT farm, that you HAVE NO IDEA what these are actually used for (something to do with milking cows...that's about all I know) and that you are going to use these to make FLANNEL BOARD pieces! Believe me...you'll get a few odd looks! Ignore those looks...and just keep on walking!
(NOTE: If you would like a way to these pieces MUCH quicker and easier...read my follow up post to this HERE!)
(NOTE: If you would like a way to these pieces MUCH quicker and easier...read my follow up post to this HERE!)
Monday, March 21, 2011
The Bean "Factory"!
I've been fascinated with the sensory table tubes at Sand and Water Tables, so I decided to try my hand at a very simple structure for the sensory table. This has been a huge success! I have one little guy who has spent most of center time each day working at the sensory table since this has been added.

This has lovingly been dubbed our "factory" by our friends from Bumblebee Boulevard who come to visit us in the afternoon. It is simply a tube from a poster I ordered (I left the plastic stopper on one end so the beans don't fall out the end) and two different sized boxes taped together with duct tape.

When the tube becomes too full of beans, the whole "factory" tips towards the tube end. According to our friend from Bumblebee Boulevard, this is when the "power goes out"! We then tip the tube up, dump the beans back into the hole and begin the process all over again!


Then again, when you want to be able to see the beans and not feel like you are losing them, sometimes it is more fun to fill up baskets and empty them out again!
Wednesday, March 16, 2011
"Oooooo....the 'Magic' Teacher!"
A little guy came to visit our room from the larger classroom today while we were singing the rainbow color song. As we sang, I pretended to "pour" the color out towards me, replaced it with the fruit and encouraged the children to look into the pot to see what was there.
This little guy looked at me with huge eyes and said..."HOW DID YOU DO THAT!?" :) Each time I quickly replaced the color with the fruit; he was shocked to find something new in the pot!
I talked to his teacher later, who said that he came back to the room and told her, "You know that teacher in that other room...she's magic!"
Apparently, my powers only work in the preschool classroom. I've tried to make dinner this way several times before, but it just doesn't seem to work!
Monday, March 14, 2011
Rainbow Color Fun!
Here's a little rhyme and game with a fun rainbow ending to teach colors that I learned at a workshop years ago. This year, I chose not to use all the colors, but just the ones I had actual objects to represent the colors.


Stir it, stir it, stir it a lot.
 Have the children help put the "color" in the pot and stir it up. Pull out the object that belongs with the color. Then at the end, the children can help put all the colors in the pot and stir; then pull out the rainbow as the song is finished!


You will need
- Large pot (For the effect of a pot of gold, I've used a large plastic cauldren I found on sale after Halloween),
- Large kitchen spoon,
- Color cards, cubes or playdough lids as I've used,
- Objects (or photos or drawings) of objects to represent each color.

Because I have a little guy who has a visual impairment, it's important to use an object to represent the color. He may not be able to see the color; but he will learn to associate certain objects with certain color names. For toddlers it is also a good idea to use actual objects until they begin to recognize the color (by pointing to it when asked).

(To the tune of "Skip to my lou")
"Take some (red),
Put it in a pot,
Stir it, stir it, stir it a lot.
Pour it out
Now, what'll it be?
The (prettiest apple) that you ever did see."
(repeat with other colors- orange: orange, yellow: lemon, green: lime, blue: blueberries, purple: grapes or, of course, you could change these to be whatever you want.)
"Take all the colors,
Put them in the pot,Stir it, stir it, stir it a lot.
Pour it out
Now, what'll it be?
The prettiest rainbow that you ever did see!"


Sunday, March 13, 2011
A Big Thanks...and Bill Martin reads Brown Bear, Brown Bear, What Do You See?
A BIG thanks to all of those people who follow our "walk down the long hall" each day!
40 people now follow our walk on the blog and 52 people have "liked" How Long is this Hall on facebook! The blog has seen just over 9,000 page views (although, admitedly, some of those are my own!).
I know many have found How Long is this Hall through a link- thanks to all who have posted links to our adventures!
If you enjoy reading and following our adventures in the classroom, feel free to "like" us on facebook and join us on the blog! On the facebook page, I do try to post some information, ideas and activities about and for children that I happen across on the internet as well.
Thanks to everyone who provides me with activities, ideas and information through your own blogs! I'm not sure what I did before I found some of these blogs! I have been inspired to try new things in the classroom and have been able to get feedback on things I have tried! This is invaluable! Of course, this isn't the ONLY place I receive feedback on my teaching, but still helpful!
I'll leave you with a video clip of Bill Martin Jr. reading Brown Bear, Brown Bear...just because I love the book!
(True...true...I had no idea what to write about today...which is how this post started! But, I do enjoy knowing that at least someone is reading what I write...at least sometimes...ok, if not many, at least maybe my mom! "Hi Mom")
Saturday, March 12, 2011
Man on the Move!
I have a little guy in my room who is a "man on the move!" We all know these children! He's a bundle of energy, constantly in motion, constantly seeking deep pressure. He enjoys running at people and objects and slamming his body into them. He doesn't often simply hold an adults hand; he hangs from their arm. He LOVES rough and tumble play and initiates this by smiling and tumbling onto a lap, or by kicking, wiggling and hitting when he is unable to run into things.
Originally, I thought of creating a "crash pad" area in the gym, with a bean bag chair or a large cushion (large dog beds found at a discount store work well for this) to slam into. He seems to get more excited the more he slams though, so I didn't want to have a child so wound up he couldn't calm himself down!
So, rather than spending our time in the gym with a child running at me and slamming into me as hard as he could (don't think my body can take it much longer!), I hooked up the therapy swing.
Ahhhh...the power of swinging! At first, he laughed and wiggled his body. But, soon he started to relax and slow down. This little guy spent about 15 min. in the therapy swing. We had to stop when we started noticing his eyelids drooping! We wanted a relaxed child, not a sleeping child!
After this activity, he walked down the hall holding an adults hand without hanging or pulling, he came into the classroom calmly and washed his hands. He was able to sit to listen to a 5 minute book and a quick song without kicking, hitting or rolling on the floor. He spent 10 min. painting with us. He then came over and danced with us, without slamming into people or hanging from adults.
When you find something that works for a child, it can be very powerful and have an immediate result! 15 minutes in the therapy swing helped him stay calm enough to enjoy participating for the next half hour in activities.
NOTE: For more resources on sensory processing disorder and/or sensory diets see the bottom of this previous post.
Friday, March 11, 2011
Did I MISS Something?!
I think I must have MISSED something this week! I think a little guy in my room was swapped out for a braver, happier, more comfortable and playful version of himself!
This little guy in my classroom is beyond shy. He has been in my classroom for months now. We have a total of 5 children in the classroom. It generally takes him until Friday before he feels comfortable enough to even move around without looking like a version of the tin man from The Wizard of Oz! When he spoke it was single words only and so quietly you needed to put your ear right next to him to even hear what he was saying! If he needed help with something he would simply sit, looking terrified, until an adult noticed him struggling! If another child took something from him, he said nothing!
So, imagine my surprise when he came up behind me at center time the other day and said in a nice LOUD normal indoor voice, "I can hear a noise!" I nearly fainted! But, I quickly recovered and asked him what he thought he might have heard. It seemed as if he may be trying to initiate play, not necessarily actually wanting to find the source of an actual sound; so I suggested we go try to find what was making the noise (keep in mind, this is a child who has never participated in any simple pretend play in the classroom...ever!).
We walked around the room, pretending to sneak around. We looked for bears, we pretended there was a bear in the hall; we ran back to the book area and "hid". Throughout this, this little guy kept up a running commentary, saying things like: "I hear something." "I see something."
When he started mentioning seeing something, I suggested we look through our binoculars and put my hands up to my eyes peering through pretend binoculars. He did as well. We named the children we saw through the binoculars.
Then we hid behind the table until another child (who had come to visit from the other classroom) came over to wash her hands at the sink. (By this time, we were pretending to look for a monster!) I said, "Oh, look, there's the monster!" and pointed to the child. She laughed and came up to us and made a big monster sound. This little guy laughed! He laughed!
The previous day, this would have made him stand stock still and stare at her as if she was trying to hurt him! This is the same child who looked terrified the first time I gave him a "high five"!
Well, not this day! Apparently, he's decided we're OK! Apparently, he's decided we may even be a bit of fun! Well, I was certainly happy to meet this new version of himself! I hope he sticks around!
Thursday, March 10, 2011
Hanging On!
For some reason I feel behind...behind on IEP stuff...behind on planning...behind on responding to e-mails...behind on READING e-mails...behind on working on the data team...behind on filing paperwork...behind on working on our outdoor learning area additions...behind on relaxing...behind on blogging (only had 2 posts ready for this week- so that got me through until Tuesday)...
OK- Let's face it...behind on LIFE or at least WORK! Needless to say, I will be leaving this post shortly! I will be taking a jaunt over to the IEP website to finish goal updates...then I will be heading down the path to list making; namely, making a list of things I MUST finish tomorrow...or ELSE!
Then...THEN...I WILL be relaxing...and I will try to leave the list of things to do until tomorrow...where I will hopefully leave work feeling like I am keeping up with the treadmill...not hanging on for dear life...and then I will relax, because tomorrow is Friday!
Tuesday, March 8, 2011
Scissor Snipping Tips!
We have recently begun our love of snipping paper with scissors! With each group of children, I tend to have some obsessed 'scissor snippers' in the group! (Or, paper-tearing children, as I had last year!) I sometimes think it must become an obsession because generally the children are not allowed to do this much at home! Well, for whatever reason, it does seem to fascinate some children!
We always have small plastic scissors to use with our playdough. These scissors work well for playdough, but are completely plastic, so won't cut through paper.
 Unfortunately, we had to return our dearly loved adapted scissors to our assistive tech. loan library (but check out the link to see what they looked like). I am in the process of ordering one of these for our little guy who needs these to keep in the classroom! There are other low-tech versions of adapted scissors. (check these out HERE if you are interested)


The blue scissors shown here are supposedly designed to make cutting easier for a child just beginning to snip paper. They ONLY close. The child does not do anything to open the scissors; they stay open. I do NOT find them easier. In fact, I have yet to have a child in my classroom who has enough physical hand strength to close these so they will actually cut!
 These green scissors (above) are the typical children's scissors. They work well enough for children who have the the fine motor skills and the hand strength to open and close the scissors and snip the edge of the paper. For most of the children in my classroom, these are too difficult to manipulate to make any snips in paper.
I expected a lot from the orange handled scissors above...but I was a bit disappointed! The idea behind these is a technique that I learned originally from another preschool teacher here. The child has more stability and is able to manipulate the scissors better when they use the index finger to stabilize the scissors. Therefore, the child's thumb goes into the medium sized loop (the single loop), the index finger goes through the small top loop and the child's middle and ring finger go through the large loop.
This is a great idea and works very well if you simply use regular scissors for this technique. Unfortunately, these scissors are so stiff, that the children have difficulty opening and closing them!
 Here is how you would use this technique with regular scissors. The thumb goes into the large loop, then the middle finger goes into the small loop and the index finger goes above this. (Of course, the thumb would normally be on top- I just wanted to show how you would position the fingers).
 The green scissor shown above are currently my favorite pair of scissor to use with children! These were a MAJOR steal! I found these at the Dollar Store. They are probably NOT going to last forever, and every once in a while you need to pop the middle spring back in, but for a DOLLAR a piece, I'm pretty impressed! These scissors actually teach the open/shut motion needed for snipping! The yellow spring in the middle simply springs the scissors back open for the child! For some reason, these do seem to work the best! I have not used them for an extended period of time, so I'm not sure if they'll hold up. But for actual child-ease and the ability to cut paper...I think these are the best option!
Now, here are a few tips for WHAT children should begin snipping:
We always have small plastic scissors to use with our playdough. These scissors work well for playdough, but are completely plastic, so won't cut through paper.


We also have a vast array of various scissors in our scissors box! All five of the scissors in the photos above are from our scissors box!

These are traditional 'training' scissors. Apparently, you are supposed to have the child put his fingers in the inner two loops, while an adult puts their fingers in the outer two loops and assists with the cutting motion. I have NEVER found these helpful. They are very difficult to maneuver for an adult and don't actually cut ANYTHING! So....there they are....sitting in our scissors box! But, they're not lonely in that box, as I have more scissors that I dislike!

The blue scissors shown here are supposedly designed to make cutting easier for a child just beginning to snip paper. They ONLY close. The child does not do anything to open the scissors; they stay open. I do NOT find them easier. In fact, I have yet to have a child in my classroom who has enough physical hand strength to close these so they will actually cut!

This is a great idea and works very well if you simply use regular scissors for this technique. Unfortunately, these scissors are so stiff, that the children have difficulty opening and closing them!


Now, here are a few tips for WHAT children should begin snipping:
- Playdough is always the easiest to begin with and to practice the technique of snipping.
- Index cards or card stock should be the next step. (The thicker the paper, the more success the child will have.)
- I also love to use long strips of construction paper for the children to snip. They can then snip all along the edge making a fringe to feel!

As this was sitting in my edit posts box waiting for photos to be inserted, I noticed that there were several other wonderful posts on scissors on other blogs. So, please check out these from Teach Preschool and Teacher Tom. I'm also sure there are more wonderful posts out there on favorite scissors and scissor techniques so check around!
Monday, March 7, 2011
Mud "Cakes"!
Beginning last week with the animals stuck in the mud, I have been introducing the children to "mud play". Of course, for most children, this would not be a skill that would need to be taught. Most preschool children would jump right in and explore mud in a variety of ways!
 For some children with more significant special needs, play may need to be specifically taught. While there are times to use scripted play schemes or joint action routines, I tend to try to keep this type of play as similar as possible to what a typically developing child would experience.
In this case, I presented the children with the "mud" in the sensory table, a basket of rocks, a few cake pans, some scoops and some plastic salt shakers filled with blue sand!
As the children began exploring the mud, I brought out the scoops and cake pans and demonstrated how they could scoop the mud into the cake pans and pat it down. I allowed them to attempt and then brought out the rocks and showed them how they could push them down into the mud in the cake pan. I finally brought out the salt shakers of sand and demonstrated how to shake them on the "cake". (...and then we shook, shook, shook and emptied the salt shakers!)
 Later this week, I may introduce a more scripted play scheme using these materials; but for now, I wanted the children to experience this play in the most natural way possible. While this is a natural play experience, several things are changed in order to assist the children in exploring this and in order to increase the odds that they will then explore this in a new environment (outdoors) and with more children.
Here are the things that are a bit different for my group than for most preschool groups:
 Of course, we also provide language and model what is possible with the materials. We work on using our senses to explore the materials. After we are a bit comfortable with the materials themselves, we invite children from the integrated classroom to come join us and play. This offers more peer models and language models.
The last step in this sequence is to introduce this type of play (with these materials) in a completely natural setting (outside). Once the children have a few play schemes they feel comfortable engaging in, repeating or watching, it is more likely that the most natural play will go well and will be a positive experience for the children!
NOTE: Even with these adaptations, not all children will participate in this activity. Many children with sensory processing difficulties will find this type of play very difficult to engage in. I often find an alternative activity for children who will find this type of play overwhelming or overstimulating. However, rather than simply allowing the child to avoid this altogether, we work with the child at the level they are at in exploring items with various textures/smells etc. and work with them in a very sequential way in order to explore more items.

In this case, I presented the children with the "mud" in the sensory table, a basket of rocks, a few cake pans, some scoops and some plastic salt shakers filled with blue sand!
As the children began exploring the mud, I brought out the scoops and cake pans and demonstrated how they could scoop the mud into the cake pans and pat it down. I allowed them to attempt and then brought out the rocks and showed them how they could push them down into the mud in the cake pan. I finally brought out the salt shakers of sand and demonstrated how to shake them on the "cake". (...and then we shook, shook, shook and emptied the salt shakers!)

Here are the things that are a bit different for my group than for most preschool groups:
- Our group size is very small. I have a total of 5 children in my classroom and 4 adults.
- We spend a great deal of time with the same materials- without introducing any new ones (generally a week or more).
- I control the variables to the play: we introduce new play in a very controlled environment (the classroom) rather than starting with outdoor play (where there are clearly many more variables).

The last step in this sequence is to introduce this type of play (with these materials) in a completely natural setting (outside). Once the children have a few play schemes they feel comfortable engaging in, repeating or watching, it is more likely that the most natural play will go well and will be a positive experience for the children!
NOTE: Even with these adaptations, not all children will participate in this activity. Many children with sensory processing difficulties will find this type of play very difficult to engage in. I often find an alternative activity for children who will find this type of play overwhelming or overstimulating. However, rather than simply allowing the child to avoid this altogether, we work with the child at the level they are at in exploring items with various textures/smells etc. and work with them in a very sequential way in order to explore more items.
Sunday, March 6, 2011
Off to Mail a Postcard!


Well, on Friday the weather was finally nice enough for us to go take a walk to the mailbox to mail one of our postcards with our friends from the other classroom. Just so you know, the walk to the mailbox is NOT a small adventure! We have to cross one street with walk signs that are not possibly long enough for an average ADULT to make it across the street, let alone a child! Even with only taking a small portion of children at a time, we had to walk fast! With that being said, we made it! All children accounted for and safe...no adults suffering a true heart attack while crossing the street! (Although, I may have had a minor one!)


By the time we got to the mailbox, the children were excited about everything else around them (including a firetruck parked at the grocery store!) and mailing one postcard was a bit anti- climatic! I'm sure this won't be our last trip to the mailbox though, so perhaps they will be a bit more excited next time, since everything won't be quite as new!


Saturday, March 5, 2011
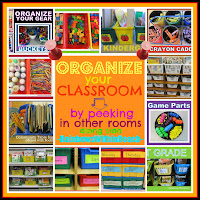
Organizing All of our Stuff...Part V
I keep thinking I'll come to the end of these "Organizing" posts...but, there's just way too much to organize around here! Well, here we go... on to post number 5! You can catch up with I HERE, II HERE, III HERE and IV HERE if you would like!

Now, if you have complete collections of songs on an Mp3 player, keeping track and organizing Cd's may not be an issue! I simply don't think most preschool classrooms are ready to completely do away with Cd's. If we're going to keep them, we need some way to keep TRACK of them!

Quite a few years ago, I decided I was sick and tired of messing with CD cases and those bulky plastic holders for the Cd's. For a while I tried a small vinyl CD holder. It worked...but not well. I ended up buying a MUCH larger vinyl CD holder with 4 CD spaces in each sleeve, rather than only one or two spaces.

This has made all the difference in the world! Before, I would have to fight with finding the song number for any CD that didn't have the songs listed directly on the CD itself. Now I simply slide the CD in one section of the sleeve and opposite this, I slide the list of songs. This case holds a total of 208 Cd's. (...if you use every space for Cd's. Since I am using one side for the song lists it obviously doesn't hold as many.)

I tend to have several Cd's by the same artist. Therefore, I organized the Cd's in the case by artist or type of CD. I simply attached sticky tabs to the side of the CD sleeves to separate the Cd's. Here are some of the organizational tabs for the Cd's (Although, I'm currently in the process of reorganizing since I have a few more Cd's to add!):
(NOTE: I HAVE all the Cd's I have burned onto the routines and favorites Cd's. I have just placed them on several Cd's to make it easier to find!)
 I've also created labels for each CD so I know where each belongs (labels are attached to the pocket where the CD belongs). Although, I certainly won't pretend they actually are put BACK correctly during the day, this does help tremendously as I'm picking up Cd's before I head home!
At the end of the day, I simply put all the Cd's back where they belong, song lists are next to the Cd's and everything is in one large CD holder. This takes up much less space and stays organized much longer than anything else I have tried for Cd's!
**This post is linked to Rainbows Within Reach Organize your classroom linkie!

Now, if you have complete collections of songs on an Mp3 player, keeping track and organizing Cd's may not be an issue! I simply don't think most preschool classrooms are ready to completely do away with Cd's. If we're going to keep them, we need some way to keep TRACK of them!

Quite a few years ago, I decided I was sick and tired of messing with CD cases and those bulky plastic holders for the Cd's. For a while I tried a small vinyl CD holder. It worked...but not well. I ended up buying a MUCH larger vinyl CD holder with 4 CD spaces in each sleeve, rather than only one or two spaces.

This has made all the difference in the world! Before, I would have to fight with finding the song number for any CD that didn't have the songs listed directly on the CD itself. Now I simply slide the CD in one section of the sleeve and opposite this, I slide the list of songs. This case holds a total of 208 Cd's. (...if you use every space for Cd's. Since I am using one side for the song lists it obviously doesn't hold as many.)

I tend to have several Cd's by the same artist. Therefore, I organized the Cd's in the case by artist or type of CD. I simply attached sticky tabs to the side of the CD sleeves to separate the Cd's. Here are some of the organizational tabs for the Cd's (Although, I'm currently in the process of reorganizing since I have a few more Cd's to add!):
- Greg and Steve
- Dr. Jean
- Laurie Berkner
- Carole Perterson
- Curriculum Cd's
- Mother Goose
- Rest/Nap time
- Raffi
- Hap Palmer
- Nature Cd's
- Simple Preschool Cd's
- Routines and Favorites
- Books on CD
(NOTE: I HAVE all the Cd's I have burned onto the routines and favorites Cd's. I have just placed them on several Cd's to make it easier to find!)

At the end of the day, I simply put all the Cd's back where they belong, song lists are next to the Cd's and everything is in one large CD holder. This takes up much less space and stays organized much longer than anything else I have tried for Cd's!
**This post is linked to Rainbows Within Reach Organize your classroom linkie!
Subscribe to:
Posts (Atom)
Grab the "How Long is this Hall" Button!

Popular Posts
-
Sadly, on April 30, 2013, we said goodbye to our little hamster, Bob :( So, we named him Bob. The hamster, that is. His name is Bob ....
-
 This is one of my most often used, most loved by the children and definitely, my favorite song prop! This is simply a Pringles can covered...
 -
 I got the great idea of making chocolate play-dough and making pretend chocolate candies from " Counting Coconuts ." But by the...
 -
 Oh my goodness! I am so happy I happened upon a discussion on the Teach Preschool Facebook page yesterday! Kimberly K. mentioned using m...
 -
 The other week we took a short nature walk. We pushed our small wooden doll carriage along with us and filled it with all sorts of natural...
 -
 I just knew I would have more ideas to go along with those flannelboard activities made from the milk machine filters ! Now that I know th...
 -
 Last week we spent time listening to the book "Jump, Frog, Jump!" Not only did we listen to this book on tape, but we als...
 -
 Today we started reading the book The Mitten by Jan Brett . If you want to see an awesome video clip of the story retold with stuffed anim...
 -
Do you remember my 5 Green and Speckled Frogs that I made, and now have used for YEARS!? Well, needless to say, these poor frogs and lo...
-
 Our first day back after winter break is almost always a shortened day. The elementary students don't have school at all today, so we ...